How to Fix a Tubeless Tire Puncture Safely: The Ultimate Emergency Rubber Strip Plugging Guide
Experiencing a sudden flat tire due to a stray nail or sharp screw can completely ruin your driving plans, leaving you stranded at the worst possible moment. While many drivers immediately panic and call an expensive towing service, fixing a standard puncture in a tubeless tire is actually a straightforward task that you can handle yourself. Equipped with a basic, budget-friendly tubeless tire repair kit, you can easily plug the damaged area without any advanced mechanical training. The core of this quick roadside fix relies on a heavy-duty sticky rubber repair strip, which physically seals the opening to prevent air from escaping. Knowing how to execute this emergency procedure properly saves you time, cuts down on unexpected maintenance expenses, and gives you total peace of mind during long road trips.
Step-by-Step Puncture Repair: Inserting the Rubber Repair Strip
To begin the emergency repair process, you must first locate the puncture object, remove it carefully with pliers, and clean out the opening using the rough rasp tool provided in your kit. Once the path is clear, take a fresh sticky rubber repair strip from your kit, thread it directly through the eyelet of the specialized needle insertion tool, and center it perfectly.
Apply a small amount of rubber cement adhesive to the strip if your kit includes it, position the tip over the puncture, and push the tool firmly straight down into the tire tread. You must leave about a quarter of the strip’s ends visible above the surface. Once the plug is deeply seated, pull the insertion tool quickly and straight upward out of the tire; the needle will split open at the tip, releasing the sticky rubber plug and leaving it tightly wedged inside the puncture hole as a permanent physical seal.
Trimming the Excess Plug and Re-Inflating to Optimal Pressure
After successfully setting the plug, you will be left with a small portion of sticky rubber material protruding awkwardly from your tire tread. Take a sharp pocket knife, razor blade, or the cutting tool from your repair kit and carefully trim away this excess material so that it sits completely flush with the surrounding tire profile.
Tubeless Tire Puncture Repair: Safety and Verification Checklist
| Repair Step Phase | Required Tool / Equipment | Core Objective & Practical Safety Benefit |
| • Plug Insertion | T-Handle Needle Tool + Rubber Strip | Fills the physical puncture gap to stop immediate structural air loss. |
| • Flush Trimming | Razor Blade or Utility Knife | Removes excess rubber so the patch doesn’t catch on the asphalt while driving. |
| • Pressure Calibration | Portable Air Compressor / Gauge | Restores recommended PSI to ensure stable vehicle handling and safety. |
| • Bubble Leak Test | Soapy Water Solution | Provides visual confirmation that the seal is 100% airtight and secure. |
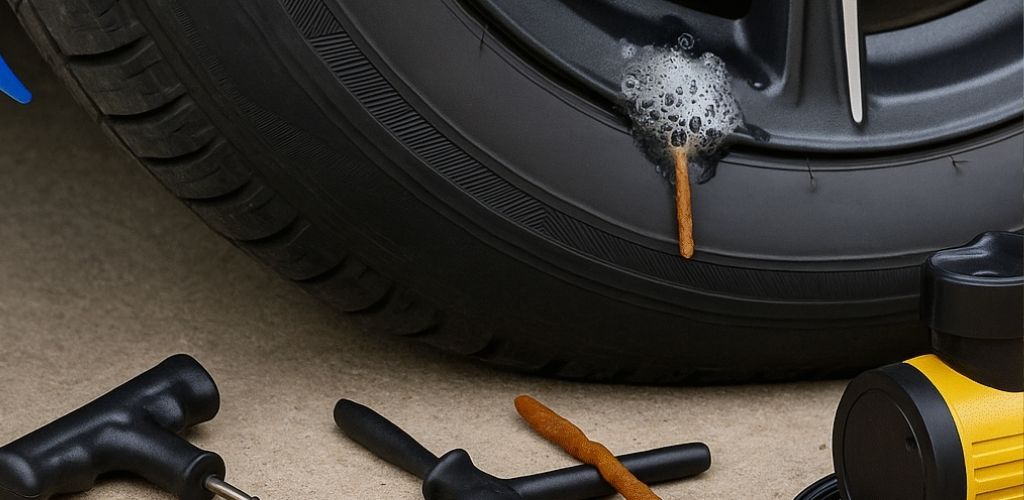
With the plug cleanly trimmed, attach a portable air compressor or hand pump to the valve stem and re-inflate the tire back up to your vehicle manufacturer’s recommended specification. To verify your work, spray a generous amount of soapy water directly over the newly patched area; if the liquid remains completely still and no growing air bubbles emerge, your emergency repair is fully airtight and successful.
The Practical Benefits of DIY Tubeless Tire Repair Kits
Mastering this simple emergency plugging method offers several massive advantages for daily commuters, off-road enthusiasts, and budget-conscious drivers alike. First and foremost, this technique requires absolutely zero tire demounting, meaning you never have to wrestle the heavy rubber off the metal wheel rim or jack up your car on a dangerous highway shoulder.
It is an incredibly cost-effective solution that can be completed in under fifteen minutes using a compact tool kit that fits easily inside your glove box or trunk organizer. Furthermore, when this temporary plugging process is executed precisely and clean rubber seals are established, the resulting patch is incredibly durable, frequently holding air pressure reliably for several months and allowing you to drive safely to your destination.
Crucial Safety Precautions and Limitations of Tire Plugs
While a rubber strip plug is an exceptional tool for saving your day during a roadside emergency, you must strictly respect its mechanical boundaries to avoid dangerous tire blowouts. This specific repair methodology must only be applied to punctures located cleanly within the main, flat structural tread zone of the tire.
If the puncture hole is exceptionally large, jagged, or located along the flexible sidewall of the tire, do not attempt to plug it under any circumstances, as sidewall plugs are prone to sudden failure under cornering loads; in these severe scenarios, installing a spare tire or replacing the tire entirely is the only safe option. Additionally, remember to monitor your tire pressure gauge regularly over the next few days to catch any slow, microscopic leaks early, and treat this quick intervention as a reliable temporary fix until a certified mechanic can inspect the internal liner.
Ultimately, a portable tubeless tire repair kit is one of the most empowering, cost-efficient, and practical investments any driver can make for their vehicle’s emergency roadside kit. By understanding the simple mechanics of cleaning a puncture, threading a rubber strip, and verifying the airtight seal with a quick soapy water check, you transform a potentially stressful, expensive breakdown into a minor, easily manageable fifteen-minute pause. Taking control of your own vehicle maintenance not only saves you hard-earned money but also ensures you are never left helpless waiting for a tow truck in remote areas. Keep a high-quality plug kit tucked safely under your seat, stay alert to your car’s handling dynamics, and drive with absolute confidence knowing you can handle any nail or screw the road throws your way!