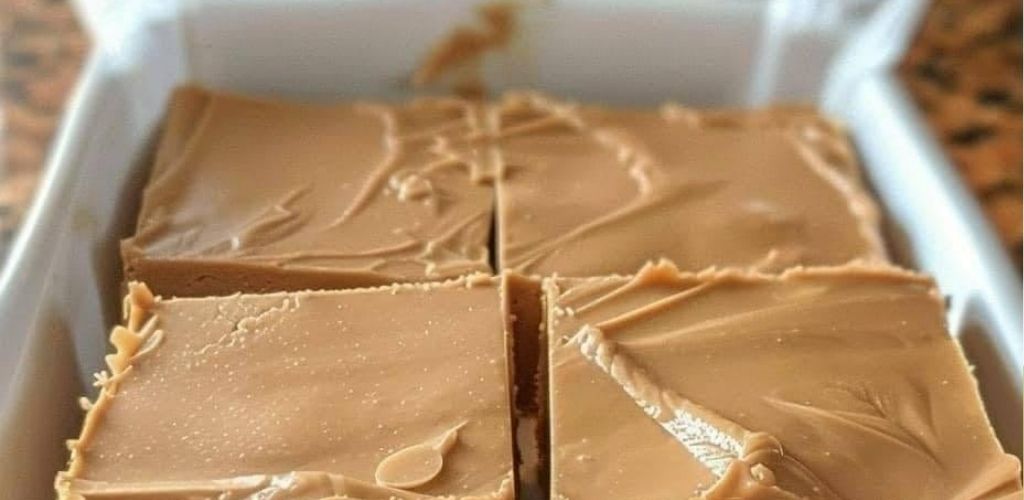
The Ultimate 2-Ingredient Peanut Butter Fudge: No-Cook and Foolproof
Let’s settle this once and for all: you can actually make creamy, rich, melt-in-your-mouth fudge using only two ingredients and zero actual cooking. This isn’t just a trick; it’s the ultimate kitchen hack for those moments when a sudden sweet craving hits. Imagine the salty-sweet perfection of pure peanut butter transformed into a firm, sliceable candy that is ready in minutes. This is the 2-ingredient peanut butter fudge—a dessert that breaks all the traditional confectionery rules and sets you free from the stove.
More than just a recipe, this is pure freedom in a pan. It is the perfect solution for days when you need a quick treat for a school bake sale, a last-minute gift, or a moment of indulgence without turning on the burner. With just a bowl and a microwave, you are only minutes away from unadulterated peanut butter bliss. Prepare to make a fudge that will make you question every complicated recipe you’ve ever tried before.
Why This 2-Ingredient Method Actually Works
The science behind this “cheater” fudge is surprisingly simple yet effective. Most traditional fudge requires precise temperatures and a candy thermometer, but this method bypasses the stress entirely. By using specific pantry staples, you achieve a consistent texture every single time without the risk of crystallization or burning.
- The Frosting Magic: Standard store-bought vanilla frosting is essentially a pre-made mix of sugar, fats, and stabilizers. When melted and combined with peanut butter, these ingredients reset into a classic fudge consistency.
- No Thermometer, No Stress: There is zero risk of burning the sugar or misjudging the “soft ball” stage. It is inherently foolproof.
- The 5-Minute Promise: From opening the containers to chilling, the active work takes less than five minutes of your time.
Assembling Your Power Duo: Ingredients
To ensure guaranteed success, the type of ingredients you choose matters. While it is tempting to go “all-natural,” the chemistry of this specific hack relies on stabilized products to achieve the perfect slice.
Ingredients and Customization Options:
| Component | Amount | Recommended Type |
| Vanilla Frosting | 1 container (16 oz / 454g) | Standard creamy (not “whipped”) |
| Peanut Butter | 1 jar (16 oz / 454g) | Creamy, stabilized (e.g., Jif or Skippy) |
| Optional: Sea Salt | A pinch | Coarse grain for topping |
| Optional: Chocolate | ½ cup | Semi-sweet chips to stir in or drizzle |
| Optional: Vanilla | 1 tsp | For an even deeper flavor profile |
Note: Avoid natural peanut butters where the oil separates, as they can lead to a greasy finish that doesn’t set firmly.
The Foolproof 3-Step Method for Fudge Freedom
- The Melt (2 Minutes): Empty the entire container of frosting and the full jar of peanut butter into a large, microwave-safe bowl. Microwave on high for 60 seconds. Remove and stir. If the mixture isn’t completely smooth, continue microwaving in 15-second intervals, stirring in between, until you have a glossy, pourable consistency.
- The Set (1 Minute): Pour the molten mixture into an 8×8 inch pan lined with parchment paper or lightly greased with non-stick spray. Smooth the surface with a spatula. If you’re adding sea salt or chocolate chips, sprinkle them on immediately while the surface is still tacky.
- The Chill (The Hardest Part): Place the pan in the refrigerator for at least 2 hours, or until the fudge is completely firm to the touch. Once set, use the parchment paper to lift the block out of the pan and slice it into 1-inch squares using a sharp knife.
Pro-Tips for Guaranteed Success
To get perfectly clean slices, always use parchment paper. It allows you to lift the entire block of fudge out of the pan, so you aren’t struggling to cut the first piece out of a corner. For chocolate lovers, you can create a beautiful marbled effect by melting half a cup of chocolate chips with a teaspoon of coconut oil and drizzling it over the top before chilling.
Storage is simple: this fudge keeps beautifully in an airtight container in the refrigerator for up to 2 weeks. While it can sit out at cool room temperature for a few days, it maintains its best “fudge-like” bite when kept chilled. If you are gifting it, keep it in the fridge until the very last moment to ensure the squares stay sharp and professional-looking.
The Verdict: Is It “Real” Fudge?
Let’s be honest: this isn’t the traditional fudge made with sugar, butter, and milk that your grandmother might have stirred for an hour. However, it has its own unique, highly addictive texture and unmistakable flavor. It is an incredibly fast, delicious, and satisfying peanut butter treat that captures the essence of fudge with startling ease.
In terms of speed, simplicity, and guaranteed success, this recipe is unbeatable. It proves that sometimes the best results come from working with what you have and combining two perfect things to create something even better. So, grab that frosting and peanut butter—in five minutes, you’ll have a whole pan of sweet deliciousness and you’ll never be without a dessert option again.
Have you tried this 2-ingredient hack before? We love hearing about your kitchen wins! Please SUBSCRIBE to our page for more genius dessert shortcuts, give this post a LIKE, and SHARE it with your fellow peanut butter lovers. What’s your favorite “emergency” dessert? Let us know in the comments below!