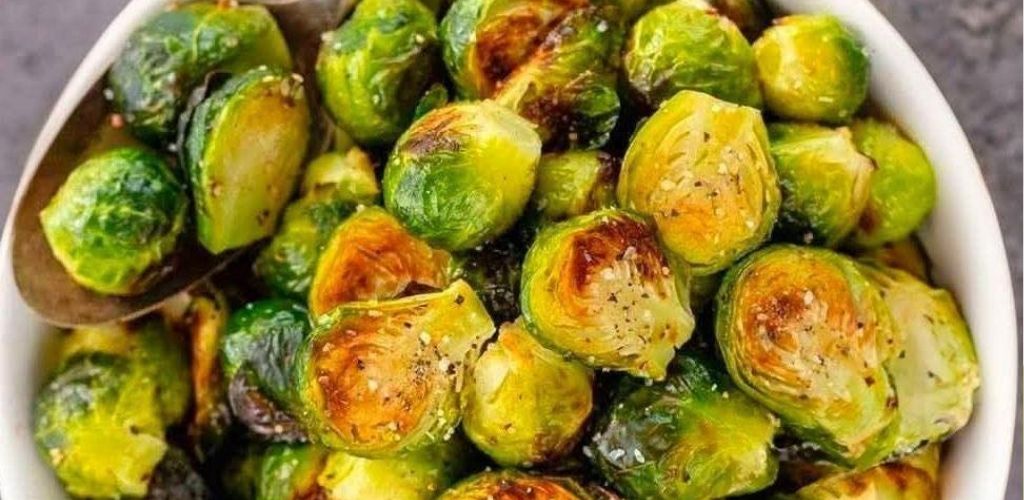
Crispy Air Fryer Brussels Sprouts: The Ultimate Quick and Healthy Side Dish
Brussels sprouts have undergone a massive culinary transformation, evolving from a misunderstood vegetable to a star of the dining table. The secret to their newfound popularity? The air fryer. By using rapid air circulation, you can achieve a level of crunchiness that a traditional oven simply cannot match. This recipe focuses on creating that perfect contrast: a charred, golden-brown exterior with a tender, buttery center.
Whether you are looking for a nutritious snack or a sophisticated side dish for a family dinner, air-fried Brussels sprouts are the answer. They require minimal prep time and far less oil than traditional deep-frying, making them a heart-healthy choice. In less than 20 minutes, you can turn these green gems into a gourmet treat that even the pickiest eaters will enjoy.
Essential Ingredients for Perfect Results
To get the best flavor and texture, start with fresh, firm Brussels sprouts. Avoid those with yellowing leaves or soft spots. While the base recipe is simple, the quality of your olive oil and seasonings makes a world of difference. You can also customize the flavor profile by adding aromatics like garlic or red pepper flakes for a bit of heat.
Ingredients List:
- Brussels Sprouts: 1 lb (500g), trimmed and halved.
- Olive Oil: 2 tbsp (Extra virgin is best for flavor).
- Garlic: 2 cloves, minced (optional for a savory kick).
- Seasoning: Salt and freshly ground black pepper to taste.
- Optional Toppings: Grated Parmesan cheese, balsamic glaze, or fresh lemon zest.
Step-by-Step Air Frying Instructions
- Preheat Your Equipment: Set your air fryer to 375°F (190°C) and let it warm up for about 3–5 minutes. Preheating ensures the sprouts start sizzling the moment they hit the basket, which is key for maximum crunch.
- Seasoning and Coating: In a large mixing bowl, toss the halved Brussels sprouts with olive oil, minced garlic, salt, and pepper. Make sure every sprout is evenly coated; the oil is what helps the leaves caramelize into those delicious “chips.”
- The Cooking Process: Place the sprouts in the air fryer basket in a single layer. Do not overcrowd the basket, as this will cause the vegetables to steam rather than fry. Cook for 15–20 minutes.
- The Golden Rule: Halfway through the cooking time, take the basket out and give it a good shake. This redistributes the oil and ensures all sides are exposed to the hot air for an even, golden finish.
- Finishing Touches: Once they are crispy and tender, transfer them to a platter. While still hot, sprinkle with your choice of Parmesan, a drizzle of balsamic glaze, or a zest of lemon.
Comparison: Oven Roasting vs. Air Frying
Many people ask if the air fryer is really better than a standard oven. The answer lies in the physics of the appliance. An air fryer is essentially a high-powered convection oven that moves air more efficiently across a smaller surface area. This results in faster cooking times and a much crispier texture without the need for excessive amounts of fat or oil.
| Feature | Air Fryer | Traditional Oven |
| Cooking Time | 15–20 Minutes | 35–45 Minutes |
| Texture | Super Crispy / Crunchy | Soft / Roasted |
| Oil Required | Minimal (1-2 tbsp) | Moderate (3-4 tbsp) |
| Preheat Time | Fast (3 min) | Slow (10-15 min) |
Pro-Tips for Maximum Crunch
If you want those extra-crispy leaves that taste like vegetable chips, try this: after halving the sprouts, collect any loose leaves that fell off during the trimming process. Toss them in the oil and add them to the basket. These small leaves will brown much faster than the halves, providing a delightful variety of textures in the final dish.
Additionally, make sure your Brussels sprouts are dry after washing them. Moisture is the enemy of crispiness! Use a kitchen towel or paper towel to pat them dry before adding the oil. If the sprouts are wet, the oil won’t stick properly, and you’ll end up with a soggy texture instead of the desired crunch.
Air fryer Brussels sprouts are a game-changer for anyone looking to eat more greens without sacrificing flavor. With the right technique—preheating, not overcrowding, and shaking the basket—you can create a restaurant-quality side dish right in your own kitchen. They are versatile enough to pair with steak, chicken, or even as a standalone healthy snack during your favorite show.
The combination of the savory garlic and the sweetness that comes from caramelization makes this recipe a winner. Don’t be afraid to experiment with toppings; a drizzle of honey or a handful of toasted walnuts can take this dish to the next level. Enjoy your healthy, crispy, and delicious creation!
Did you love this air fryer hack? We are constantly sharing new ways to make healthy cooking fast and fun! Please SUBSCRIBE to our page for more delicious recipes, give this post a LIKE, and SHARE it with your friends and fellow foodies. Do you have a favorite air fryer topping? Let us know in the comments below—we’d love to hear your ideas!