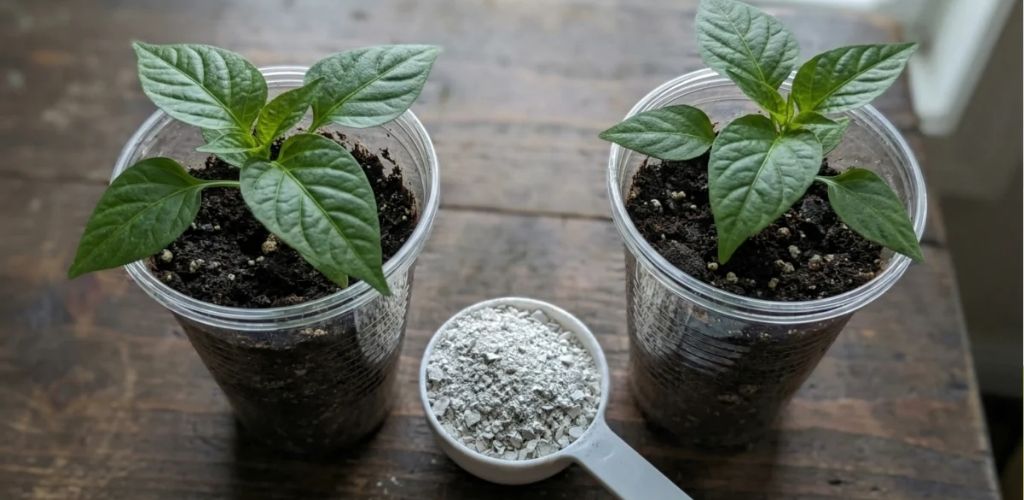
The Secret to Strong Pepper Seedlings: Simple and Effective Fertilization
Many gardeners struggle with thin, spindly pepper seedlings that stagnate or even die after being transplanted into the garden. However, there is an incredibly affordable and effective way to fertilize pepper seedlings that transforms them into robust, resilient plants ready for a record-breaking season. Growing peppers from seed is a fascinating journey, but it requires precision during the first few weeks of the plant’s life. A seedling lacking proper light and balanced nutrition quickly turns into a fragile stalk with pale leaves—a clear distress signal of malnutrition.
The most critical period occurs about ten days after transplanting (picking out), when the root system stabilizes and begins an intensive search for minerals. If you fail to provide essential elements at this stage, the plant’s growth potential may be permanently stunted before it ever reaches the open soil. Proper care now is the foundation for juicy, thick-walled peppers later in the summer.
Why Standard Potting Soil Isn’t Enough for Peppers
While we often rely on high-quality peat and humus mixes, the nutrient reserves in a small starter pot are exhausted surprisingly quickly. Young pepper plants consume phosphorus and potassium in massive quantities to build strong cell walls and sturdy tissues. If your soil mix includes river sand for better drainage, the nutritional value decreases even further in favor of aeration. While the plant can breathe well in such an environment, it will soon begin to starve for the microelements that pure sand cannot provide.
Inadequate fertilization of pepper seedlings usually manifests as a complete halt in growth and the gradual yellowing of the lower leaves. This condition is a cry for help that every experienced grower should address before the growing points begin to die off. To avoid this, you need a supplement that provides minerals without forcing the plant to grow too tall too fast.
Natural Treasure from the Fireplace: How Wood Ash Strengthens Plants
Wood ash is not mere waste; it is a concentrated source of over thirty vital minerals. Its greatest advantage in the early stages of pepper growth is the absence of nitrogen, which prevents the plants from “stretching” or becoming leggy in low-light conditions. The potassium found in ash strengthens the immune system of young plants and increases their resistance to transplant shock. Meanwhile, the calcium ensures the stem grows thick and sturdy, minimizing the risk of snapping during handling.
DIY Wood Ash Fertilizer Guide:
| Component | Amount | Instruction |
| Wood Ash | 1 tablespoon | Use clean wood ash (no plastic/trash) |
| Water | 1 liter | Use filtered or standing water |
| Steeping Time | 3 hours | Allow nutrients to leach into the water |
| Frequency | Every 10 days | Replace one regular watering |
Applying this solution regularly will cause the stems to darken and the leaves to take on a healthy, deep-green hue with a glossy surface.
The Vital Role of Phosphorus in Root Development
Without a powerful root system, you will never achieve large fruits because the plant cannot efficiently absorb water and minerals from deeper soil layers. Phosphorus is the “engine” of the root system, and its deficiency in the early stages is the most common reason for garden failure. Ash provides phosphorus in an easily digestible form that won’t burn the delicate roots—a frequent problem with synthetic fertilizers. After receiving this treatment, the plant immediately begins to expand its root ball, anchoring itself firmly in the substrate.
While ash provides the structural foundation, keep a close eye on the foliage. If the leaves remain small or pale despite your efforts, it may be time for a targeted nitrogen boost. However, phosphorus remains the priority for the first few weeks to ensure that when the plant eventually moves to the garden, it has the “plumbing” necessary to support massive growth.
When to Use Nitrogen: The Urea Rescue Method
If you observe that the leaves are light green or yellowish, it is an unmistakable sign of nitrogen deficiency. In this case, urea (carbamide) can act as an immediate energy infusion for chlorophyll production. Dissolve one teaspoon of urea in ten liters of water and gently water the soil around the plants with this mild mixture.
Warning: A crucial step after using urea is to rinse the plants with a light spray of clean water. This flushes any nitrogen residue off the delicate leaves. Urea is highly concentrated and can cause irreversible chemical burns if left on the foliage, which would unnecessarily weaken the seedling. For organic enthusiasts, a fermented nettle tea or even used coffee grounds mixed into the top layer of soil can provide a gentler, slow-release nitrogen boost.
Rules for Proper Watering and Final Care
Watering is just as important as fertilization; poor technique can lead to “damping off” or root rot. The golden rule is to always water in the morning, allowing the soil surface to dry slightly during the day. Always use room-temperature water that has sat out for 24 hours to allow chlorine to evaporate. Cold tap water shocks the pepper, stopping its growth for several days.
- Target the Roots: Always water directly at the base and avoid getting the leaves wet.
- Check Moisture: The surface may look dry, but the depth must remain slightly moist.
- Airflow: Ensure seedlings have fresh air but are protected from cold drafts.
- Humidity: If your plants are near a radiator, place a bowl of water nearby to keep the air from becoming too dry.
This comprehensive approach to nutrition ensures that your seedlings are not leggy but instead firm and prepared for the harsher conditions of the garden. Your patience and attention to detail this spring will be rewarded in the summer with baskets full of sweet, juicy peppers.
Did this guide help you save your seedlings? We love helping gardeners achieve their best harvest ever! Please SUBSCRIBE to our page for more expert gardening secrets, give this post a LIKE, and SHARE it with your friends and fellow growers. Do you have a favorite organic fertilizer trick? Let us know in the comments below—we’d love to hear from you!