How to Loosen a Seized Faucet Nut: The Ultimate DIY Guide to Stuck Tap Repairs
We have all been there. What seems like a simple household chore—replacing a leaky washer or a worn-out cartridge in your kitchen or bathroom mixer—suddenly turns into a major frustration. You grab your wrench, but the nut won’t budge. It feels as though it has been welded in place. As you apply more pressure, the wrench slips, the metal groans, and you realize that one more heavy-handed move might crack the entire faucet body.
I faced this exact situation recently. It started with a tiny, annoying drip that eventually turned into a constant stream of wasted water. Tired of constantly turning off the main water supply, I decided to fix the mixer once and for all. However, as soon as I began disassembling it, I hit a wall: the retaining nut was so severely “seized” after years of use that standard methods were completely useless.
Why Do Faucet Nuts Get Stuck?
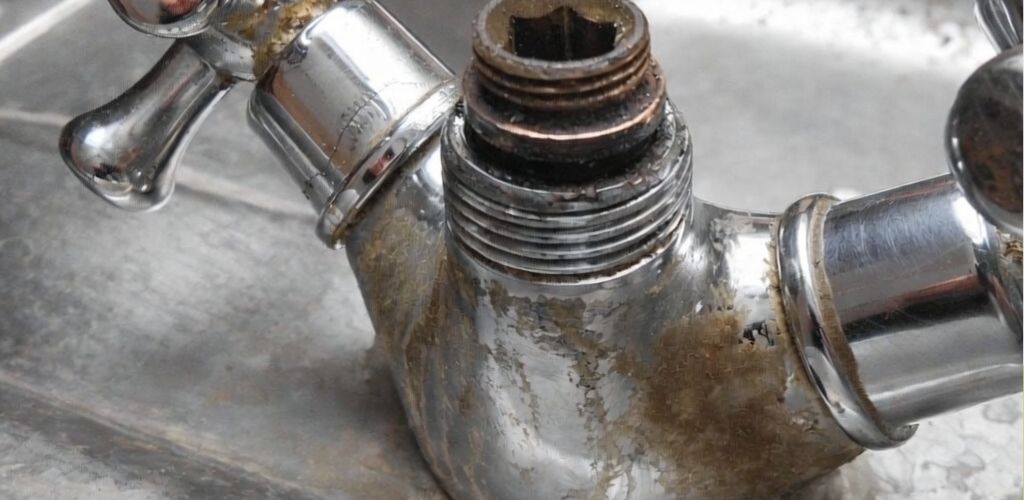
The primary culprit behind a seized faucet nut is the constant exposure to moisture and temperature fluctuations. Over time, water—especially hard water—leads to the formation of rust and stubborn mineral deposits (limescale). These deposits act like a powerful natural glue, effectively “fusing” the threads of the nut to the faucet body.
The result is a connection that feels monolithic. When you attempt to unscrew it with a standard adjustable wrench, the tool often lacks the grip or the correct angle to break the bond without damaging the decorative finish of the tap. Force alone is rarely the answer and often leads to stripped threads or a broken mixer.
Common Methods That Often Fail
Like most DIYers, my first instinct was to reach for a can of WD-40. I sprayed the connection generously and waited thirty minutes, hoping the lubricant would penetrate the threads. The result? Zero movement. The nut remained frozen, and the mixer body began to flex dangerously under the load of my wrench.
I also considered using a blowtorch to heat the connection, a common trick for stuck automotive bolts. However, I quickly realized the risks: modern faucets contain plastic internal parts, rubber seals, and delicate chrome plating. One wrong move with a flame, and the entire unit would be ruined, turning a cheap repair into an expensive replacement.
The Secret Vinegar Hack That Actually Works
The solution turned out to be surprisingly simple and cost-effective. By using common household items, you can chemically dissolve the mineral bonds holding the nut in place. Follow these steps for a stress-free repair:
- Step 1: Shut off the water supply completely. Never start plumbing work without this precaution.
- Step 2: Remove the decorative handle or cap to expose the problematic nut.
- Step 3: Soak a cloth in ordinary white vinegar and wrap it tightly around the seized nut. Leave it for at least one to two hours (the longer, the better).
- Step 4: Lightly tap the edges of the nut with a small hammer. Do not use heavy force; the goal is to create micro-vibrations that help the vinegar penetrate deeper and break up the limescale.
- Step 5: Use a tubular socket wrench (box spanner) instead of an adjustable one. This tool distributes force evenly across all faces of the nut, preventing slips and deformation.
In my case, after the vinegar soak, the nut gave way almost immediately with very little effort. No cracking sounds, no broken parts, and no need to buy a new faucet.
Essential Tool Comparison for Plumbing Repairs
| Tool Type | Pros | Cons |
| Adjustable Wrench | Versatile, fits many sizes | High risk of slipping and rounding corners |
| Tubular Socket Wrench | Distributes pressure evenly | Requires specific sizing for the nut |
| Pliers/Pipe Wrench | Strong grip | Will likely scratch or ruin chrome finishes |
| Vinegar Soak | Dissolves minerals safely | Requires patience (1-2 hours) |
Pro Tip: If your nut has a high-quality chrome finish and you are worried about scratches, wrap a strip of leather or an old leather belt around the nut before applying the wrench. The leather provides excellent grip while acting as a protective cushion for the metal.
Final Thoughts on DIY Plumbing Success
A seized nut is not a catastrophe; it’s just a challenge that requires a different approach. The most important lesson I learned is that brute force is your enemy. Patience, a bit of chemistry (vinegar), and the right tool for the job will always yield better results than rushing and risking a broken pipe.
By taking your time and following these steps, you can save yourself a call to the plumber and the cost of a new mixer. Modern home maintenance is about working smarter, not harder. Keep your tools ready and your vinegar handy, and no stuck nut will stand in your way!
Did this DIY hack help you save your faucet? We are dedicated to providing the most practical home repair tips and plumbing secrets! If you enjoyed this guide, please SUBSCRIBE to our page for more household maintenance insights. Give us a LIKE if you’ve successfully tackled a “stuck” project recently, and SHARE this post with your friends to help them save money on plumbing repairs. Have your own secret for loosening stuck bolts? Let us know in the comments below!