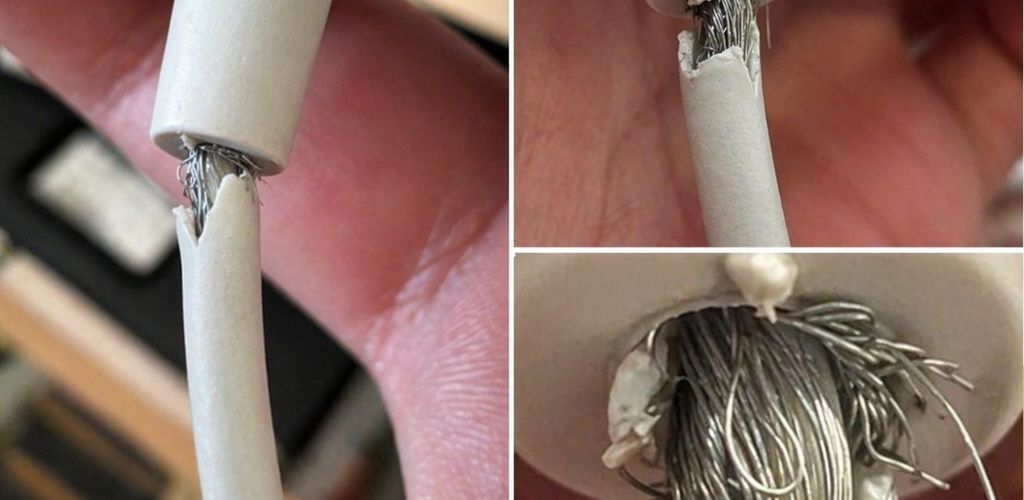
DIY Cable Repair: The Spring and Hot Glue Method for Lasting Results
One of the most effective and durable ways to fix a broken charging cable—especially those annoying frays near the connector—is a clever DIY hack using a small metal spring and hot glue. Instead of tossing your expensive charger into the trash, this method creates a robust “armor” around the wires. It’s a professional-grade fix that not only saves you money but significantly extends the life of your tech accessories.
Why Cables Break and How This Hack Fixes Them
Most USB and lightning cables fail due to “stress points” where the flexible cord meets the rigid plastic connector. Constant bending causes the internal copper wiring to fatigue and eventually snap. By using a spring (like those found in old ballpoint pens) combined with hot glue, you create a graduated strain relief system. This setup distributes the bending force across a wider area, preventing the sharp angles that kill most chargers.
Step-by-Step Guide to Repairing Your Frayed Cable
- Gather Your Materials: You will need a small tension spring (recycled from a pen or an old headphone cable), a hot glue gun, and a pair of scissors.
- Slide the Spring On: Carefully thread the spring onto the cable and slide it over the damaged or frayed section. Make sure the spring overlaps both the rigid connector and the flexible cord.
- Apply Hot Glue: Use your glue gun to coat the spring. Start from the connector side and work your way down. The glue should seep between the coils to bond the spring firmly to the cable’s outer jacket.
- Create the Strain Relief: Important! Leave the last 2-3 millimeters of the spring’s tail without glue. This allows the very end of the spring to flex slightly, acting as a buffer that prevents a new stress point from forming at the edge of the repair.
- Cooling and Testing: Let the glue harden completely (about 5 minutes). Once cool, give the cable a gentle tug and plug it in to ensure it’s charging correctly.
Comparison of Cable Repair Methods
| Method | Durability | Cost | Aesthetics |
| Electrical Tape | Low | $ | Poor |
| Heat Shrink Tubing | Medium | $$ | Good |
| Spring + Hot Glue | Very High | Almost Free | Industrial |
| Buying New | High | $$$ | Perfect |
The Secret Benefit: Mechanical Reinforcement
What makes this method superior to just using tape is the physical reinforcement provided by the metal coils. The spring acts as a skeleton, while the hot glue serves as the “skin.” Together, they create a composite material that is much stronger than the original rubber casing. I personally used this trick to save an original iPhone charger that lasted for three additional years of daily use, even after the white casing had completely split open.
Sustainability and Savings in the Digital Age
Beyond the immediate benefit to your wallet, repairing your electronics is a major win for the environment. Electronic waste (e-waste) is a growing global problem, and millions of perfectly functional chargers are discarded every year simply because of a small tear in the plastic. By spending five minutes on a DIY repair, you reduce your environmental footprint and keep unnecessary plastic and copper out of landfills.
Final Safety Tips for DIY Electronics
While this method is fantastic for low-voltage data and charging cables (5V to 20V), never attempt this on high-voltage power cords (like those for a toaster or a vacuum cleaner). If you see exposed bare copper or sparks, it’s best to replace the cable entirely. However, for your smartphone, tablet, or laptop charger, this spring-and-glue technique is the ultimate “survival hack” for your tech.
Did this DIY hack save your favorite charger? We love helping you fix things! Make sure to SUBSCRIBE to our page for more genius life hacks and tech tips. Don’t forget to LIKE this post and SHARE it with your friends so they can save money on cables too! Have you tried this method before? Let us know in the comments!