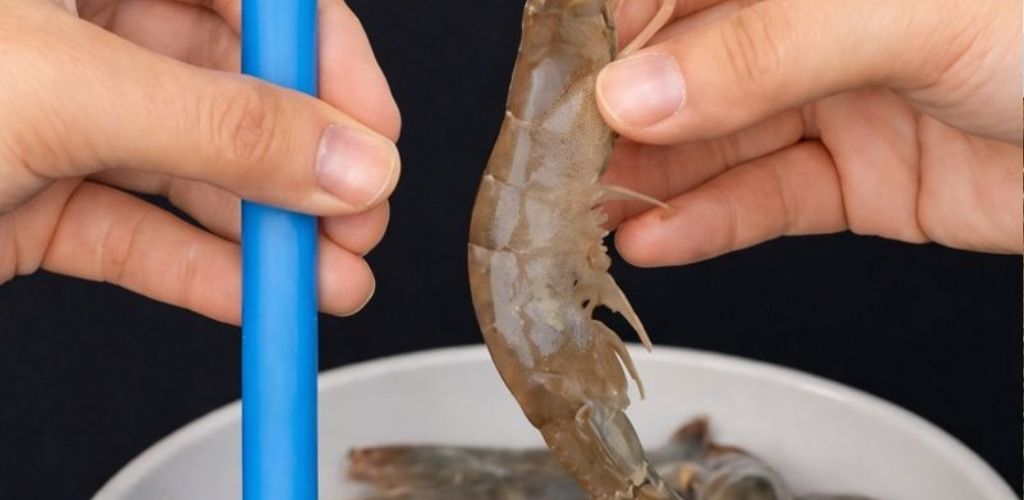
For a long time, cleaning shrimp was seen as an awkward task: sharp knives, imprecise cuts, slippery hands, and broken shrimp. However, a much simpler, faster, and more efficient approach began to gain popularity in both home and professional kitchens.
The key is not in cutting more, but in understanding the natural structure of the shrimp and using it to your advantage.
And when you see it in action, the reaction is immediate:
it was much easier than it looked .
Why is it important to properly remove the shrimp vein?
The so-called “black vein” of the shrimp is simply its digestive tract . While it doesn’t always pose a serious danger, it can:
- To affect the flavor, making it bitter or with a strong fishy taste
- Ruin the texture, especially in stir-fries and grilled dishes.
- To give the dish an unhygienic appearance
In delicate preparations or when the shrimp is cooked whole, removing it correctly makes a big difference.
Common mistakes when cleaning shrimp
Many traditional methods have clear disadvantages:
- They break the shrimp meat
- They require very sharp knives
- They waste time
- They make more of a mess than necessary
That’s why smarter alternatives emerged, designed to keep the shrimp intact and speed up the process.
Method 1: Remove the vein using the shrimp head
This is one of the cleanest and most effective methods.
How to do it:
- Identify the hard, pointed spine on the front of the head.
- With scissors, cut that thorn diagonally.
- Gently squeeze the remaining head: the internal organs will come out.
- Pull carefully and the black vein will come out completely on your back.
Advantages:
- Keeps the shrimp whole
- The vein comes out completely
- Very hygienic and fast
Method 2: The straw trick
Ideal for beginners.
How to do it:
- Insert a straw between the head and body of the shrimp.
- Gently push to the correct point.
- Pull carefully: the internal organs will come out.
- Pull out the black vein with your fingers.
Advantages:
- No knives required
- Very easy to learn
- It maintains the shape of the shrimp
Method 3: Complete extraction by removing the head
This method is faster, although it does not preserve the whole shrimp.
How to do it:
- Slightly open the shell on the sides of the head.
- Gently bend your head.
- Hold the body with one hand and pull the head with the other.
The head, internal organs, and vein come out together.
Advantages:
- Extremely fast
- It works with fresh or frozen shrimp
Method 4: Controlled head-body separation
A more precise variant of the previous method.
How to do it:
- Hold the head with one hand and the body with the other.
- Gently fold to separate.
- Squeeze your head to expel the organs.
- Pull slowly to remove the entire vein.
Important tip:
Trim the hard spine and antennae before starting to avoid getting pricked.
Final cleaning for fresher, tastier shrimp
Once clean:
- Place the shrimp in a bowl.
- Add salt and clean water.
- Rub gently with your hands.
- Let it rest for 10 minutes.
- Rinse several times until the water runs clear.
This step helps reduce surface bacteria and strong odors.
Tips and recommendations
- Use scissors , not knives, for greater control and safety
- Don’t overcook the shrimp: they become tough.
- If you’re going to store them, lightly coat them with oil to retain moisture.
- Always cleanse the digestive tract, even in small shrimp.
- Practice your chosen method a few times: then it becomes automatic
Cleaning shrimp doesn’t have to be complicated or time-consuming. With these simple methods, you can achieve clean, quick, and neat results, keeping the meat intact and noticeably improving the final flavor. Sometimes, cooking better doesn’t mean doing more… but doing it smarter .