
Are you ready to transform your space with lush greenery without spending a fortune? This article is your ultimate guide to eco-friendly gardening on a budget.
We’ve all got items lying around that are destined for the recycling bin or even the landfill, but what if those “treasures” could become the perfect homes for your plants?
Get ready to unleash your creativity and discover 25 ingenious ways to give everyday objects a new life as charming, unique planters.
#1. Beer Can Succulent Planters
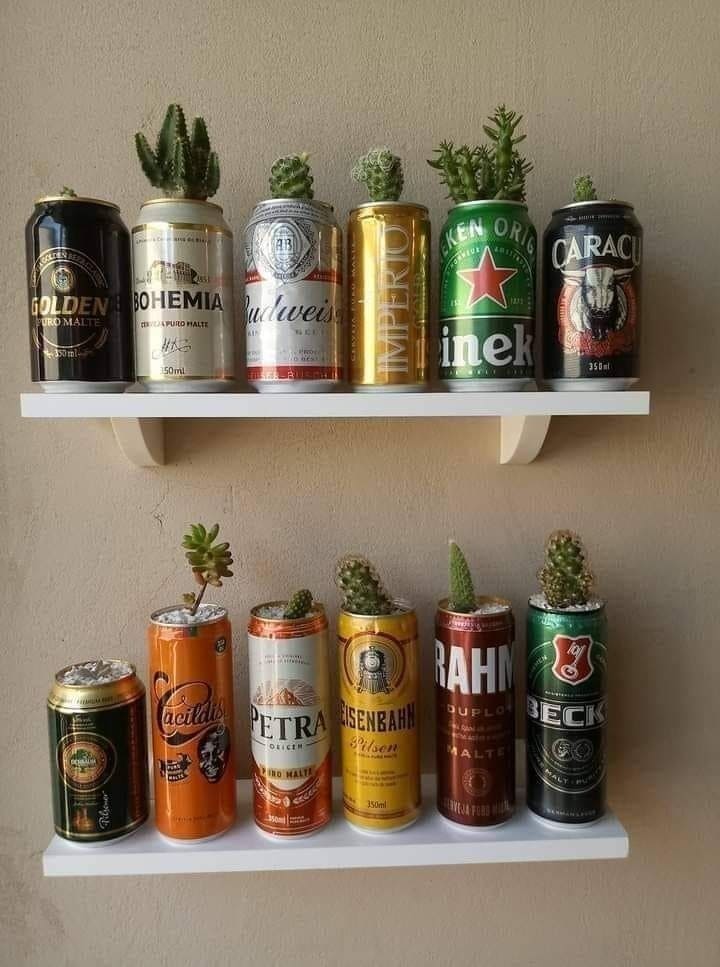
Instead of tossing out those beer or soda cans, why not turn them into eye-catching succulent planters?
Materials Needed
- 10–12 empty aluminum beer/soda cans
- Can opener
- Sandpaper (medium grit)
- Small pebbles
- Succulent/cactus soil mix
- Assorted mini succulents
- Optional: nail + hammer
Step-by-step Guide
Step 1: Rinse cans thoroughly and let dry. Carefully remove the top using a can opener or knife. Smooth sharp edges with sandpaper.
Step 2: Poke 2–3 small holes at the bottom for drainage.
Step 3: Add a thin layer of gravel, followed by soil mix. Plant your succulent and pat down the soil.
#2. Vertical Cucumber Planter in Grow Bags
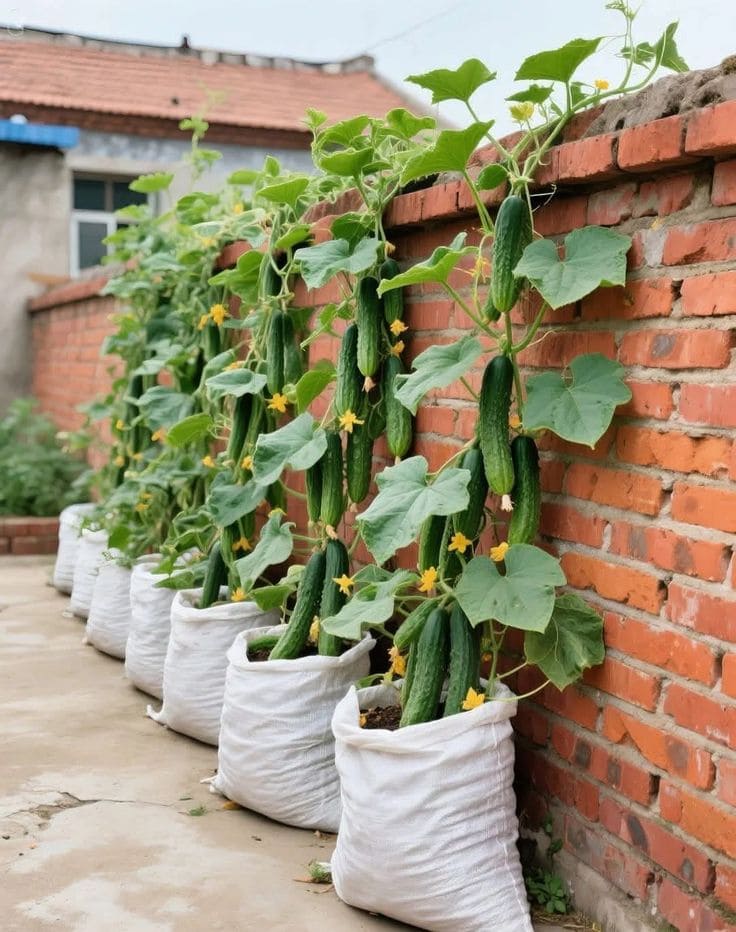
Using simple white grow bags and a nearby wall for support, you can grow a lush cucumber crop even in a narrow alley.
Materials Needed
- 5–10 white woven grow bags (40–50 cm tall, 30–35 cm wide)
- 40–50 liters of rich potting soil
- Cucumber seedlings (1–2 per bag)
- Bamboo stakes (1.5–2 meters tall)
- Zip ties or soft ties
- Fertilizer (optional)
Step-by-step Guide
Step 1: Fill each grow bag with potting soil up to 5 cm from the top.
Step 2: Plant 1–2 cucumber seedlings or sow seeds about 2–3 cm deep in each bag.
Step 3: Insert a stake into the soil or fix a string trellis against the wall behind each bag.
#3. Upcycled Bottle Water Garden
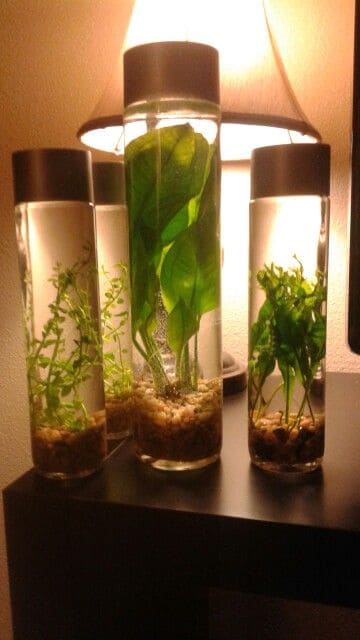
These elegant bottle gardens were born from a few tall glass bottles headed for the recycling bin.
Materials Needed
- 3–4 tall clear bottles (preferably with wide mouths, 500ml–1L)
- Washed aquarium gravel (about 1/2 cup per bottle)
- Small aquatic plants
- Tap water
- Long tweezers
Step-by-step Guide
Step 1: Clean your bottles thoroughly and remove any labels. Pour a layer of gravel into the bottom of each bottle.
Step 2: Gently insert the aquatic plants using tweezers, arranging them vertically.
Step 3: Slowly fill the bottles with water to avoid disturbing the gravel.
#4. Vintage Tin Herb Garden
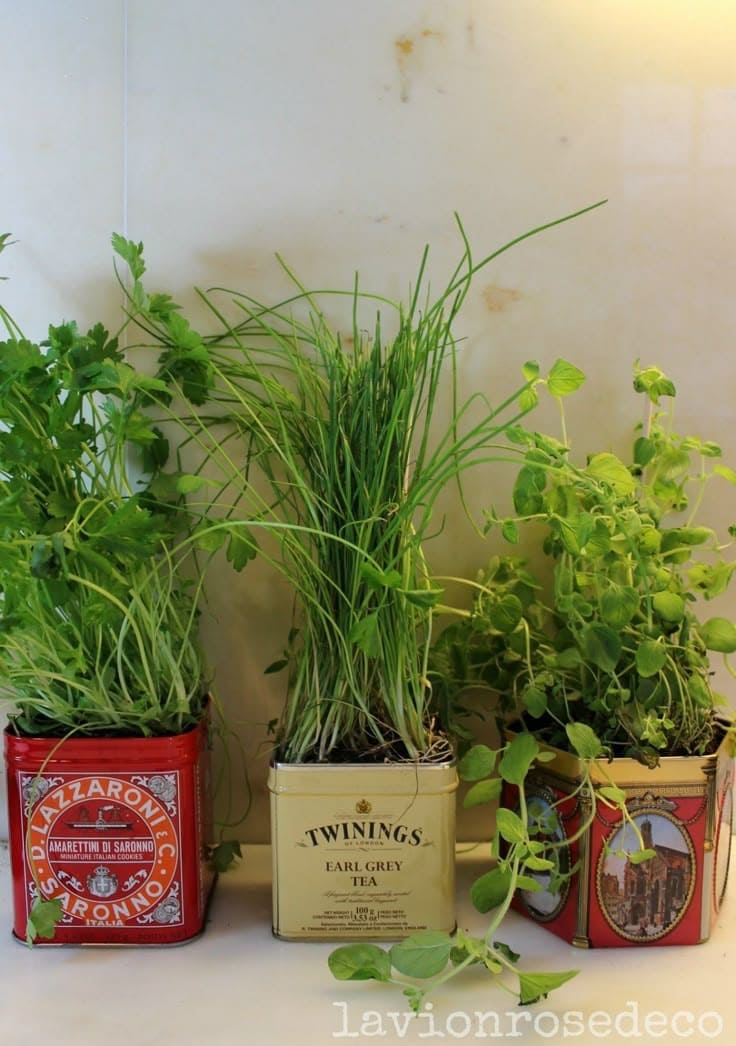
Old cookie tins and tea boxes aren’t just for nostalgia, they make surprisingly charming homes for fresh herbs.
Materials Needed
- Empty vintage tins (3.5″–5″ wide)
- Nail and hammer
- Potting soil
- Herb seedlings or cuttings (parsley, chives, oregano, etc.)
- Optional: clear sealant spray
Step-by-step Guide
Step 1: Clean each tin thoroughly and remove any paper liners or residue.
Step 2: Carefully punch or drill 3–5 small holes at the bottom for drainage.
Step 3: Add a thin layer of gravel or small pebbles, then fill with potting soil.
Step 4: Plant your chosen herbs, gently patting down the soil around the roots.
#5. Tiered Milk Jug Planter Rack
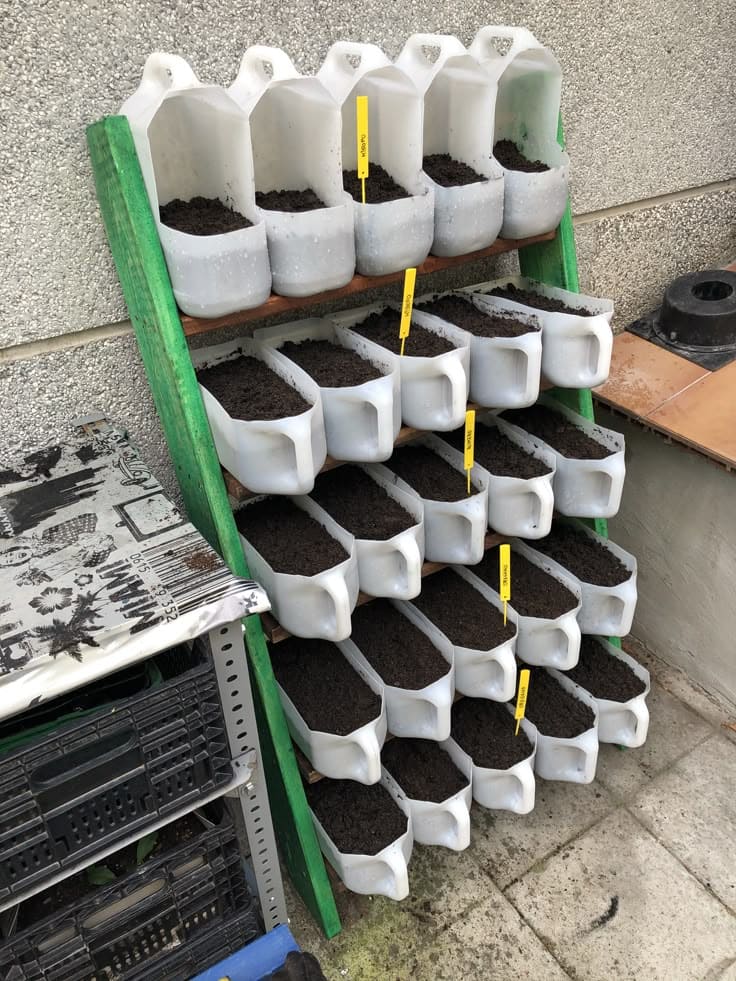
This clever upcycled planting rack transforms old milk jugs into a compact, tiered garden, perfect for herbs, leafy greens, or even flowers.
Materials Needed
- 20 empty 1-gallon plastic milk jugs
- Wooden planks (4 pieces, approx. 3 ft long each)
- Wooden A-frame (approx. 3–4 ft tall)
- Screws
- Potting soil (approx. 2 bags, 50–60 liters)
- Seeds or seedlings (lettuce, mint, parsley, spinach, etc.)
- Craft knife
- Drill (optional)
Step-by-step Guide
Step 1: Rinse and dry the milk jugs, then cut a wide U-shaped opening into each jug, keeping the handle intact.
Step 2: Drill a few small holes in the bottom of each jug for drainage.
Step 3: Assemble or repurpose a ladder-style A-frame stand. Secure wooden planks horizontally across each tier.
Step 4: Place 5 jugs per shelf with the openings facing outward. Fill them with soil, leaving a few inches from the top.
Step 5: Plant your seeds or seedlings and water them gently.
#6. Carton Garden Starters
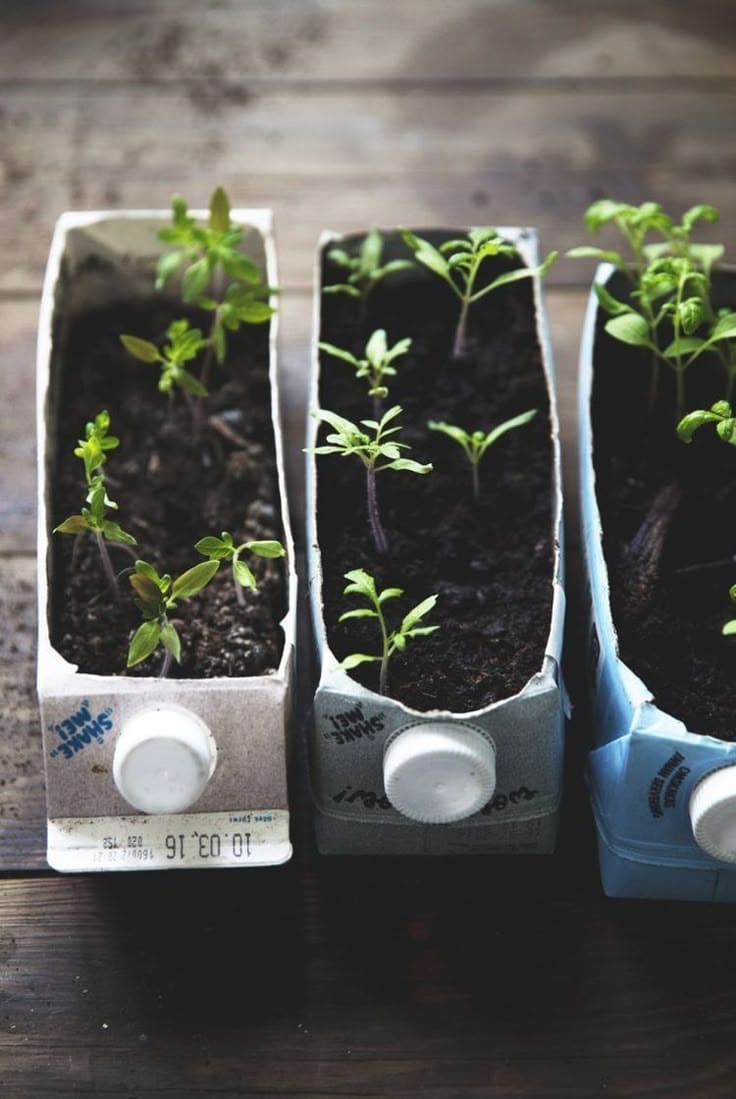
These humble milk cartons turned out to be the perfect mini nurseries for my summer veggie seedlings.
Materials Needed
- 3 used milk (1-liter size)
- Scissors
- Potting soil
- Vegetable or herb seeds
- Marker (optional)
- Nail or skewer
Step-by-step Guide
Step 1: Rinse the cartons well and let them dry. Using scissors or a box cutter, slice off the top third of each carton.
Step 2: Poke 3–5 small holes in the bottom for drainage.
Step 3: Fill each with potting soil, leaving about 1 inch from the top, then sow seeds according to packet instructions and gently water.
#7. Coconut Shell Succulent Planter
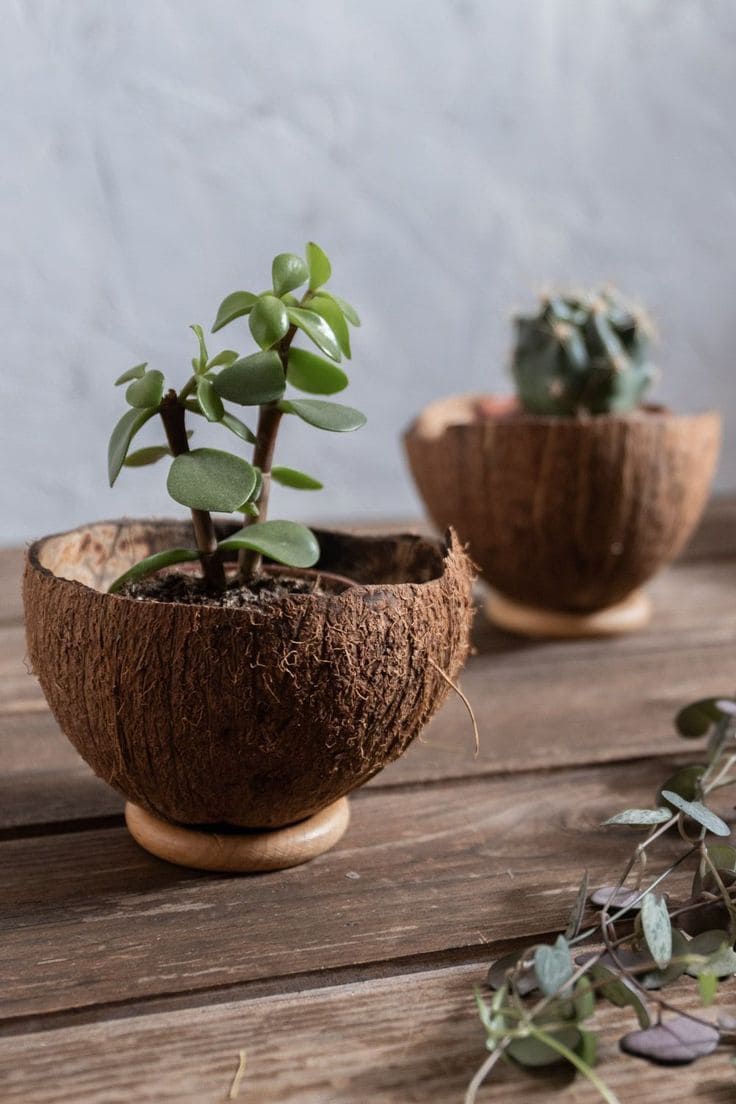
If you love minimalist décor with a touch of nature, this planter is just the thing. It’s charmingly rustic, budget-friendly, and a great way to reuse coconut shells after your smoothies or curry.
Materials Needed
- 1 whole coconut (split evenly in half)
- Fine-grit sandpaper
- Drill with small bit
- Succulent/cactus potting mix (approx. 1 cup)
- Small succulent
- Optional: wooden ring
Step-by-step Guide
Step 1: Cut the coconut cleanly in half. Scoop out the inner meat and rinse thoroughly.
Step 2: Use sandpaper or steel wool to smooth rough edges and clean the exterior.
Step 3: Drill 2–3 small holes in the bottom for drainage.
Step 4: Set the shell on a wooden ring or shallow base to keep it steady. Fill with soil and gently plant your succulent. Lightly water and display proudly.
#8. Balcony Crate Planter Garden
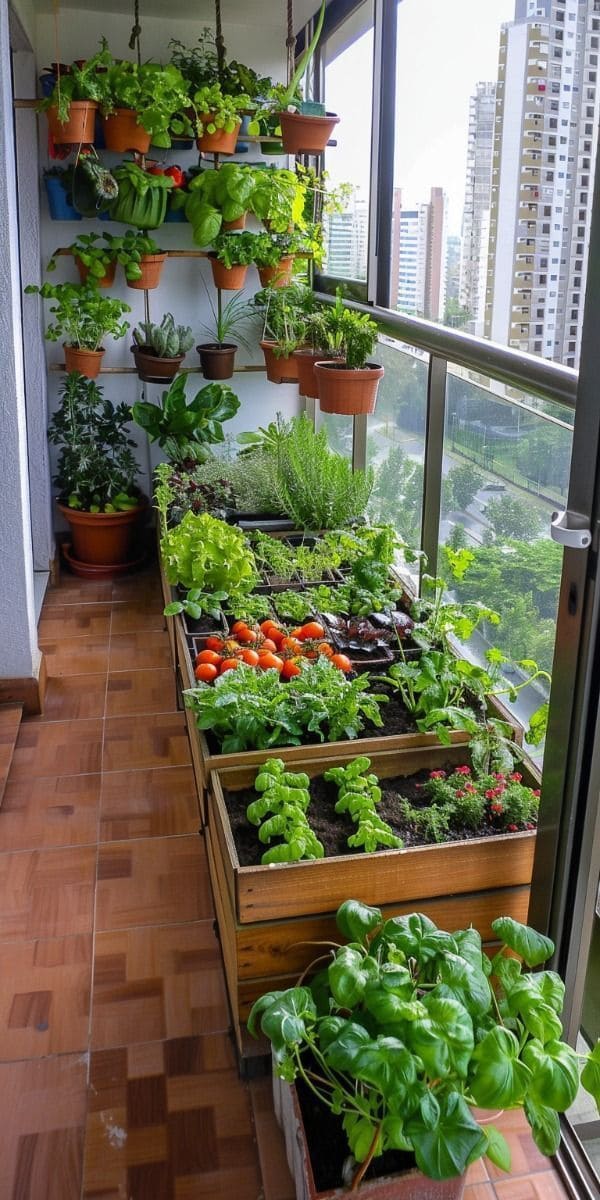
This vibrant vertical garden setup shows just how lush a balcony can become with the help of simple wooden crates.
Materials Needed
- 3–5 wooden crates (at least 16″ long x 12″ wide x 10″ deep)
- Landscape fabric
- Potting soil (1–2 bags per crate, about 40–50 liters total)
- Herb and vegetable seeds (lettuce, basil, cherry tomato, parsley, etc.)
- Screws and a drill
Step-by-step Guide
Step 1: Line the inside of each crate with landscape fabric to hold the soil and prevent leaks.
Step 2: Fill each crate about ¾ full with potting mix.
Step 3: Plant your chosen herbs and vegetables, grouping ones with similar sunlight and watering needs.
Step 4: Place the crates along your balcony where they get at least 4–6 hours of sun daily.