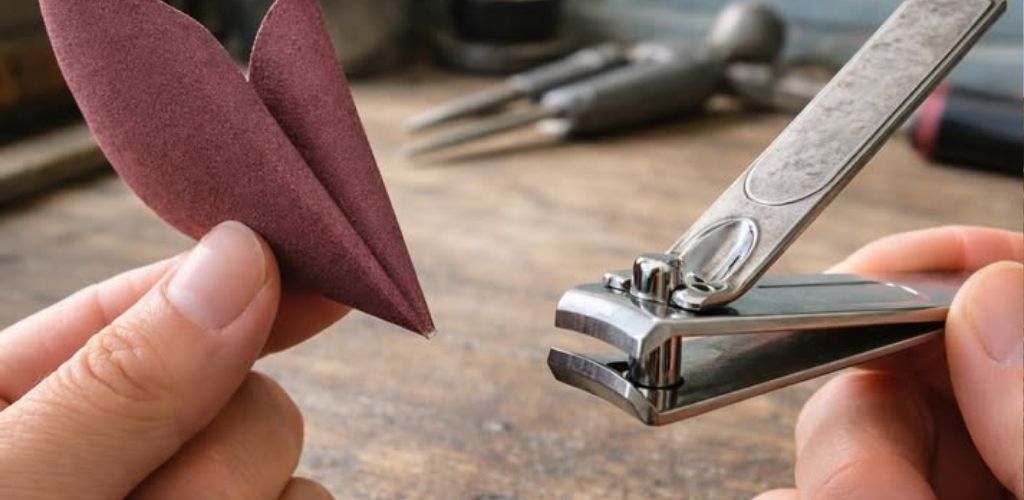

Before we talk about sharpening, let’s understand the object.
Modern nail clippers are essentially a double-bladed, curved system made of tempered steel that operates by lever action. When pressed, the two blades overlap slightly, creating a clean, shearing cut.
It’s an ingenious design. Simple. Mechanically efficient. And surprisingly durable.
But there’s a catch: it’s not designed to last forever.
Steel loses its edge for three main reasons:
- Micro-wear due to friction (each cut erodes the microscopic edge).
- Microcorrosion (bathroom humidity, contact with water).
- Impacts or improper twisting (using nail clippers for plastic, thread, staples… yes, it happens).
When the blade flattens, instead of cutting cleanly, it begins to compress the nail before separating it. Hence the sensation of “biting” or chipping.
Can you really sharpen nail clippers?
Yes. But not in the way many people think.
The common mistake is thinking you need to “file the outside.” In reality, the sharp edge is on the inner edge where both blades meet. Sharpening the outside can alter the angle and worsen the problem.
The method that is usually shown in videos—and that inspires this analysis—uses:
- Fine sandpaper (1000–2000 grit)
- Foil
- Very soft metal file
- Or even repeatedly cutting an abrasive strip
Does it work? Partly.
Why can cutting aluminum foil improve the edge?
Because aluminum is softer than steel but offers enough resistance to “clean” microscopic burrs and align the edge. It’s a kind of indirect micro-sharpening.
It’s similar to what happens when a chef “strokes” the knife on a honing steel: he’s not always sharpening from scratch, he’s realigning the edge.
Optimized practical method (more accurate than the typical viral trick)
If you want a truly effective result, I propose a better structured procedure:
Step 1: Complete disassembly
Remove the top lever and separate the two pieces. This allows for precise work.
Step 2: Deep Cleaning
Use isopropyl alcohol and a small brush. Often the problem isn’t the sharpness, it’s a buildup of residue.
Step 3: Review of the original angle
Observe the inside angle. Don’t change it. Just polish in the same direction.
Step 4: Controlled internal polishing
Using 1500–2000 grit wet/dry sandpaper:
- Place it on a flat surface.
- Slide the blade while maintaining the original angle.
- 10–15 gentle passes.
No more.
Step 5: Microseating
Cut several times a folded strip of aluminum foil or ultra-fine sandpaper.
Step 6: Test on natural nail
It should cut without excessive pressure and without chipping.
Is it worth sharpening or is it better to buy a new one?
This is where the interesting reflection comes in.
An average nail clipper costs very little. In many countries, less than a cup of coffee. So why invest time trying to recoup that cost?
The answer is not economic. It’s cultural.
We live in an era where the replaceable has replaced the repairable. Sharpening nail clippers is a small, almost symbolic act of resistance to automatic disposal.
Besides:
- A good quality steel nail clipper can last for decades.
- Cheap models tend to lose their edge faster.
- Higher quality steel responds better to polishing.
It’s similar to what happens with kitchen knives: a medium-to-high quality one can last you a lifetime if you maintain it.
Comparison: Cheap nail clippers vs. quality nail clippers
| Feature | Economic model | Quality model |
| Steel type | Low carbon | Tempered steel |
| Edge durability | Low | High |
| Sharpening response | Limited | Very good |
| Potential useful life | 1–2 years | 10+ years |
Not all nail clippers are made to be salvaged. Some simply don’t have enough structural strength.
Common mistakes that ruin the result
- File down the visible outer part. Change the angle and create an irregular cut.
- Use coarse files. The low grit creates micro-teeth that chip the nail.
- Force the mechanism by bending it. If the alignment is lost, the cut will never be accurate again.
- Do not clean before sharpening. Dirt can simulate a loss of edge.
Is it hygienic to sharpen nail clippers?
Good question.
As long as it’s properly cleaned with alcohol or hot, soapy water, there’s no problem. In fact, disassembling it for sharpening can be more hygienic than leaving it unmaintained for years.
In professional settings (podiatry or aesthetics), however, sterilizable instruments and different protocols are used. Home sharpening is for personal use.
A detail that almost no one mentions
Most people cut their nails incorrectly.
Yes. Bad.
- She cuts them too rounded (risk of ingrown toenail).
- Apply excessive pressure.
- Cut thick nails in one go.
A sharp nail clipper is no substitute for proper technique.
Practical tip:
- Cut it after showering (the nail is more flexible).
- Make small, progressive cuts.
- Don’t go deep into the sides.
A Short Story: The Day a Nail Clipper Changed a Conversation
A few years ago, at an elderly relative’s house, I noticed that she had been using the same nail clippers for over twenty years. They were shiny, well-maintained, and perfectly functional.
When I asked him why he didn’t change it, he replied, “Because it still works. And because I maintain it.”
It wasn’t nostalgia. It was habit. A culture of care.
That small object became a metaphor.
What this simple gesture reveals
Sharpening nail clippers isn’t just maintenance. It’s:
- Attention to detail.
- Waste reduction.
- Respect for objects.
- Reconnection with the repair.
In a world where we change our phones every few years, recovering a steel object seems almost radical.
Unexpected result?
The video promises an “unexpected result.” What is it really?
It’s not magic. It’s not like the nail clippers become better than new.
The truly unexpected result is realizing that:
- It wasn’t broken.
- He was just careless.
- And all it took was a little knowledge to restore it.
That lesson transcends the tool.
Final practical recommendations
- Sharpen at most once a year.
- Always use fine sandpaper (1500–2000).
- Do not change the original angle.
- Store the nail clippers in a dry place.
- Do not use it to cut plastic or thread.
And if it’s warped or the steel is too soft, accept that some objects aren’t designed to last.
A final reflection
Maybe the problem was never the nail clippers.
Perhaps it was our relationship with things.
When we stop repairing things, we also stop understanding how they work. And when we don’t understand how they work, we lose connection with the material world around us.
Sharpening nail clippers may seem insignificant. But it’s a silent invitation to observe more closely, to intervene carefully, and to remember that not everything that loses its edge needs to be replaced.
Sometimes he just needs attention.
And that—in objects and in life—changes more than we think.
What would you do? Do you repair your small tools or prefer to replace them? I’m interested to know your thoughts on this maintenance culture in times of rapid consumption.