Keeping your kitchen clean can seem like a never-ending task. Between the food scraps, oil splashes, and grease stains that accumulate daily, cleaning the stovetop is often one of the most tedious tasks.
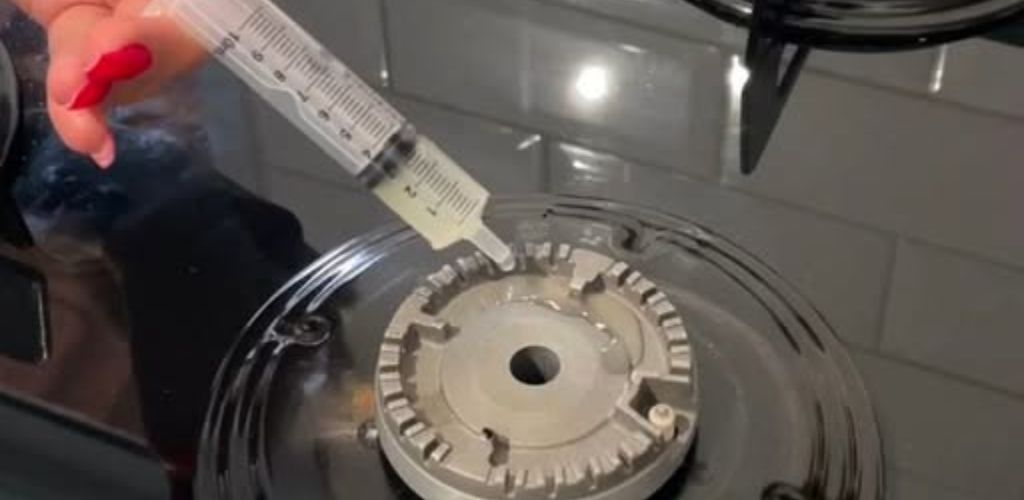
After trying different methods and products, I discovered a simple yet highly effective trick that has transformed the way I clean my kitchen: using a syringe to precisely apply the cleaning solution.
Below, I’ll explain how you can apply this trick in your home to achieve a spotless kitchen.
Necessary elements
Before you begin, make sure you have all the necessary materials on hand to make the cleaning process quick and effective:
- A used syringe (preferably a large one to facilitate application to larger areas)
- A cleaning solution (you can use a commercial cleaner or make a homemade mixture with baking soda and vinegar)
- A microfiber cloth or sponge
- Warm water
- A small container (for mixing the cleaning solution)
Procedure
1. Prepare the cleaning solution
The first step is to prepare the cleaning solution. If you’re using a commercial cleaner, make sure it’s safe for your kitchen surface. If you prefer a natural alternative, you can mix equal parts white vinegar and water, or make a paste with baking soda and a little water. Vinegar is excellent for breaking down grease and stains, while baking soda helps remove stubborn residue without damaging surfaces.
2. Fill the syringe
Once the solution is ready, carefully fill the syringe. If you’re using a larger syringe, you can fill it a little more, but avoid overfilling it so the liquid doesn’t spill when you apply it.
The advantage of the syringe is that it allows you to apply just the right amount of cleaning solution to the hard-to-reach areas.
3. Apply the solution to hard-to-reach areas
Use the syringe to direct the cleaning solution to the most difficult areas of the stovetop. This includes the corners around the burners, the gaps between metal parts, and the area under the knobs.
The narrow tip of the syringe allows for precise application, making it easier to clean areas that sponges or cloths can’t reach.
4. Let the solution act
Once you’ve applied the solution, let it sit for at least 5 minutes to give it time to break down the grease and stubborn stains.
If the stains are particularly stubborn, you can let the solution sit for a few more minutes, but avoid letting it dry completely, as this will make cleaning more difficult.
5. Rub the surfaces
After letting the solution sit, use a microfiber cloth or sponge to gently scrub the treated areas. Pay special attention to corners and edges where dirt accumulates the most.
The solution will have already loosened the dirt, making this step much easier.
6. Remove any remaining solution
Once you’re done scrubbing, wipe the entire surface with a clean, damp cloth to remove any remaining cleaning solution and loose dirt. If you want a glossy finish, you can wipe the surface with a dry cloth to buff it for a flawless finishing touch.
7. Clean the syringe
When you’re finished, clean and disinfect the syringe so you can use it in future cleaning sessions. Wash it with warm water and mild soap and rinse it well to ensure it’s completely clean and ready for the next use.
Now that I’ve discovered this trick, I can’t imagine how clean my kitchen used to be!