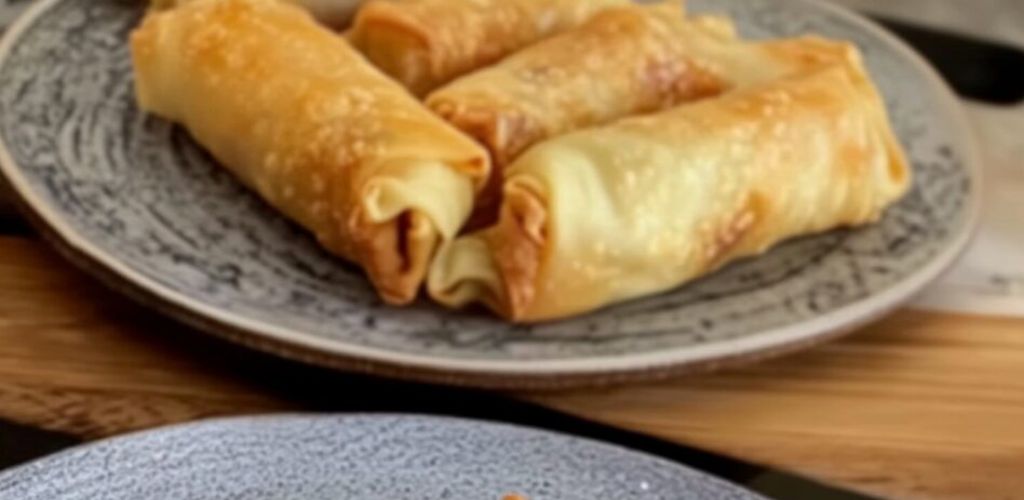
These homemade vegetable spring rolls are light, crispy, and packed with flavor, made from scratch, including the dough!
Filled with a delicious mix of vegetables and spices, they are perfect as an appetizer or snack.
These spring rolls don’t require meat and are budget-friendly, offering a great vegetarian alternative that’s just as satisfying.
Preparation Time
Prep Time: 45 minutes
Cook Time: 15 minutes
Rest Time for Dough: 30 minutes
Total Time: 1 hour 30 minutes
Ingredients
For the Dough:
- All-Purpose Flour: 200g
- Salt: 1/2 teaspoon
- Warm Water: 120ml
- Vinegar: 1/2 teaspoon (optional, for elasticity)
- Oil: for greasing
For the Vegetable Filling:
- Oil: 1 tablespoon (for sautéing)
- Garlic: 3-4 cloves, finely chopped
- Ginger: 2cm piece, grated (or 1/2 teaspoon dried ginger)
- White Part of Chives: 3 sprigs, chopped
- Onion: 1/2 large, cut into julienne
- Green Chilis: 2, sliced (or substitute with bell pepper)
- Carrot: 2 cups (180g), julienned
- Cabbage: 4 cups (240g), julienned
- Oyster Sauce or Hoisin Sauce: to taste
- Soy Sauce: to taste
- Vinegar: 1/2 teaspoon (preferably rice or apple vinegar)
- Green Part of Chives: 3 sprigs, chopped
- Sesame Oil: 1/2 teaspoon (optional)
- Cornstarch: 1/2 teaspoon (for binding)
For Sealing the Rolls:
- Cornstarch: 2 tablespoons
- Water: 2 tablespoons
Directions
- Prepare the Dough
- In a bowl, mix the flour and salt. Gradually add warm water mixed with vinegar, stirring until a dough forms.
- Knead the dough for 5-10 minutes until smooth and elastic. Shape into a ball, coat with oil, and place in a covered bowl to rest for 30 minutes.
- Prepare the Vegetable Filling
- Heat oil in a large pan over medium heat. Add garlic and ginger, cooking until fragrant.
- Add the white part of the chives and cook for 1-2 minutes.
- Stir in the onion, cooking until soft. Add chilis (or bell pepper), carrots, and cabbage, then season with salt and pepper.
- Add oyster sauce, soy sauce, and vinegar, stirring to coat the vegetables evenly.
- Mix in sesame oil and sprinkle with cornstarch. Cook for another minute, then set aside to cool.
- Form the Dough Sheets
- Divide rested dough into 12 equal pieces (about 25-27g each) and shape them into balls. Cover with a damp cloth.
- Roll each ball into a thin circle, about 5-6 cm in diameter, stacking with oil and cornstarch mixture between layers to prevent sticking.
- Stretch each stack to 22-24 cm and cook briefly (15 seconds per side) on a dry, hot pan. Separate the layers once warm.
- Assemble the Spring Rolls
- Place a spoonful of cooled filling onto each sheet. Fold in the sides, roll up, and seal the edges with a cornstarch and water mixture.
- Cook the Spring Rolls
- Deep Frying: Heat oil in a pan to medium-high. Fry rolls for 2-3 minutes per side until golden and crispy.
- Air Fryer: Lightly brush with oil, place in an air fryer at 200°C (390°F) for 10-15 minutes, flipping halfway until golden.
Serving Suggestions
- Serve with sweet and sour dipping sauce
- Pair with soy sauce or chili sauce
- Enjoy with a side of fresh salad
- Serve with steamed rice for a complete meal
- Garnish with chopped green onions and sesame seedsCooking TechniquesDeep-Frying
- Temperature: Heat oil to around 350°F (175°C) for a crispy exterior.Frying: Fry the rolls in batches to avoid overcrowding, which can lead to uneven cooking. Cook until golden brown, about 3-4 minutes per batch.Draining: Place on a wire rack or paper towels to remove excess oil.
- Baking: Brush the rolls lightly with oil and bake at 400°F (200°C) for 15-20 minutes, flipping halfway through for even browning.Air-Frying: Lightly brush with oil and air-fry at 375°F (190°C) for 10-12 minutes, flipping halfway through.
- Rolling Thin Dough: Rolling thin is essential for achieving a delicate, crispy wrapper.Avoid Overfilling: Too much filling can make rolling difficult and may cause the wrapper to burst during frying.Chilling the Filling: Ensure the filling is cool to prevent the dough from becoming soggy.
- Make-Ahead: Assemble the rolls and freeze them uncooked. Fry them directly from frozen, adding a few extra minutes to the cooking time.Leftovers: Store in an airtight container in the fridge for up to 2 days. Reheat in an oven or air fryer for a crispy texture.
- Protein Options: Add tofu, shrimp, or shredded chicken for a heartier roll.Vegetable Choices: Use seasonal vegetables, such as zucchini or snap peas, for added variety.Spicy Filling: Add finely chopped chili or a dash of hot sauce to the filling for a spicy twist.
Cooking Tips
- Elastic Dough: Add a little vinegar to make the dough more stretchable
- Check Oil Temperature: Ensure oil is hot enough to avoid soggy rolls
- Cooling the Filling: Let filling cool completely before rolling to prevent soggy wrappers
- Sealing Edges: Use cornstarch mixture to tightly seal and prevent leaks
- Air Fryer Alternative: Lightly brush rolls with oil before air frying for crispy results
Nutritional Benefits
- Fiber: Cabbage and carrots provide fiber for digestive health
- Vitamins: Vegetables are rich in vitamins A and C, supporting immunity
- Low-Fat: Air frying reduces oil, making them lighter
- Protein: Chives and sesame oil add a mild protein boost
- Antioxidants: Garlic and ginger offer antioxidants, promoting good health
Dietary Information
- Vegetarian: This recipe is vegetarian-friendly
- Vegan Option: Use vegetable oil instead of sesame oil
- Gluten-Free Option: Substitute flour with gluten-free all-purpose flour
- Low-Calorie: Air frying lowers calorie content
- Nut-Free: Contains no nuts
Nutritional Facts (Per Roll)
- Calories: ~80 kcal
- Protein: 2g
- Carbohydrates: 12g
- Fat: 2g
- Fiber: 2g
Storage
- Refrigerate: Store in an airtight container for up to 3 days
- Freeze: Place uncooked rolls in a freezer-safe container for up to 1 month. Thaw before cooking
- Reheat: Reheat in an air fryer or oven for 5-7 minutes until crispy
Why You’ll Love This Recipe
- Homemade Dough: Freshly made wrappers provide a delightful texture
- Vegetarian Delight: A wholesome meatless filling loaded with flavor
- Customizable: Easily add your choice of fillings
- Crispy Texture: Perfectly crispy with each bite
- Easy Storage: Make ahead and freeze for convenient snacking
Conclusion
These homemade vegetable spring rolls are a delicious, satisfying snack or appetizer with a perfect balance of crispy, fresh, and savory flavors. The homemade dough and veggie filling make these rolls a special treat, allowing you to control every ingredient and skip the meat while keeping the taste rich and fulfilling. Whether you fry or air-fry, these spring rolls are sure to be a hit at your next gathering or family meal.
Frequently Asked Questions
- Can I add meat to the filling?
Yes! You can add shredded chicken or ground pork for a non-vegetarian version. - Is there a gluten-free option for the dough?
Substitute all-purpose flour with a gluten-free flour blend for a gluten-free wrapper. - Can I bake the spring rolls instead of frying?
Yes, you can bake them at 400°F (200°C) for 15-20 minutes, brushing with oil for extra crispiness. - How can I keep the rolls crispy after frying?
Place them on a wire rack instead of paper towels to keep them crispy. - Can I use store-bought wrappers?
Absolutely! Store-bought spring roll wrappers can save time and work just as well.